This mini-tutorial isn't limited to filmmakers, it is for anyone who needs a high-level (or overview) of their project. Regardless of your project, if this is your end goal, check out the step-by-step tutorial below.
Step 1: Gather your team.
- When you have more than one person, the timeline will be more robust and everyone will feel more attached to the project.
Step 2: List your major tasks.
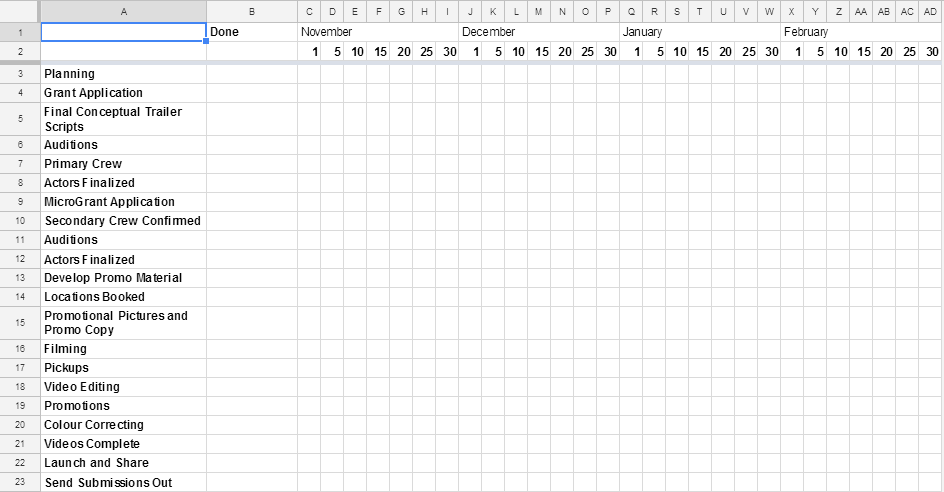
- Create a list of your major tasks, preferably listed in a linear order. Add the list in the first column. Insert a row at the top of the page and write "Done" in the second column.
- Insert a new row below.
Step 3: Figure out the month you are starting and the month your project ends.
- Decide with your team how you want to split up the chart. Do you want 1-, 3-, 5-, 10-day increments? I like 5-day increments, but some people like daily increments.
- In row 1, column C, start adding your daily increments for one month.
- Once you have 1 month worth of dates added, highlight the cells and copy the numbers and paste them in cells in the row.
Step 4: Resize Columns
- Highlight your columns, right-click the highlighted cells, select "Resize Columns".
- Choose your width. I like my column width to be 20 or 25.
Step 5: Add your months and freeze the first two rows
- In row 1, highlight the cells for each month and merge. In this example, it would be row 1, columns C-I.
- In the toolbar on the top of the page, click "View". In the dropdown, select "Freeze", and select "Two Rows". A solid grey line will be added to your spreadsheet. Now scroll down and you will notice why we freeze the first two rows.
- If your task list is long, I would recommend freezing your rows because when you scroll down, you will still see the Months and Days at the top of the screen.
Step 6: Fill in the task durations
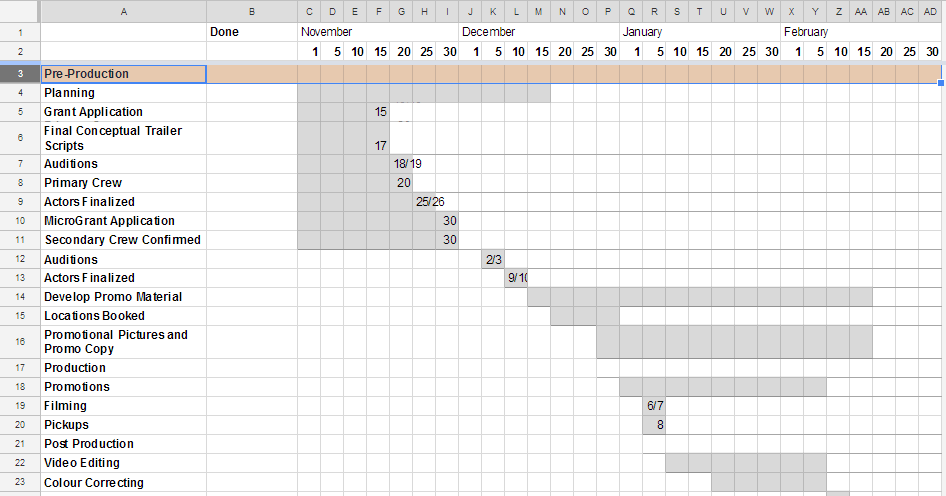
- With your team, for each task figure out how long it will take to complete. Estimate the day you want to start and the day you want to end. Then highlight the cells from the start date to the end date.
- For example, we scheduled "Grant Applications" to start the week of November 1st and to end the week of November 15th. The due date of the grant was November 15th so we typed in the specific date.
- If you have specific dates to add to your timeline, type them in.
- Continue until all your tasks have durations and your dates are added.
Step 7: Split up the Pre-Production, Production, and Post-Production
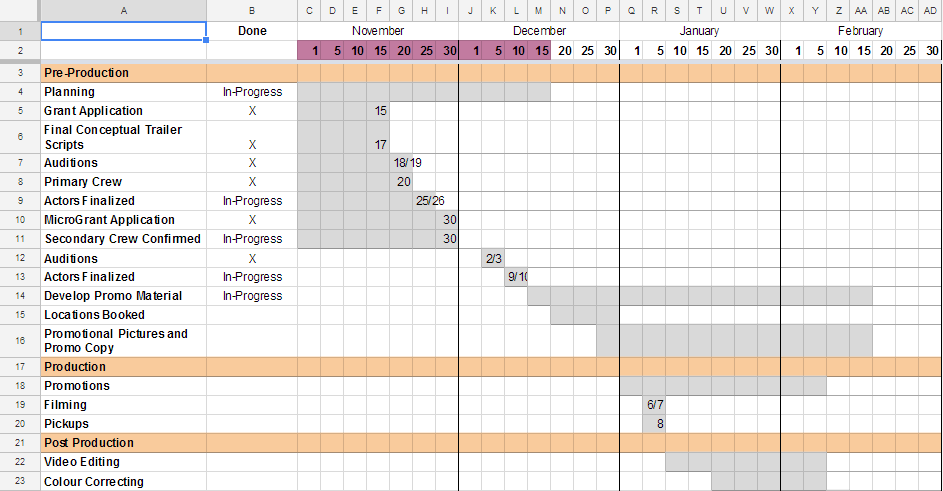
- Insert new rows to split up your major project stages (Pre, Production, and Post).
- To highlight to whole row, select the number on the far left side of the spreadsheet (in the example below that would be the "3" to the left of the "Post-Production" cell). Then click the bucket/fill tool, and select a colour you want for the cells.
Step 8: Final details
- To split up the months with a more visual representation, highlight the last month's column (in the example below, that would be "I". Click on "borders" and select the option where the line is added to the right side of the cells.
- For those who are specific about making their documents beautiful, feel free to align your text however you wish
If you are at the beginning of your project, Congratulations!
Your high-level production timeline is complete.
If you are a procrastinator, keep reading. Womp womp.
Step 8b: Final final details
- Welcome procrastinators! Let's finish this up.
- Update your progress in the "Done" column. For example, Today is December 14th, so I will add an "X" if it is complete and if it is almost done, I will add "In-Progress".
- In the second row, highlight the dates you've completed and that's it!


